How To Put Your Routes Into Groups Using Tags
ADVERTISEMENT
More How-To Guides
- How to contribute to the Road Bikeable map layer
- How to trace over other routes
- How to download a route to a Suunto watch
- How To Shift A Route Left Or Right To The Side Of The Road
- How to view a route in 3D in Google Earth
- How to delete your account
- How to show gradients on a route map
- How to use keyboard shortcuts
- How to correct map errors
- How to link Plotaroute with Epic Ride Weather
Watch Our Video Tutorials
VIEW TUTORIALS
Join In Our Forums
VIEW FORUMS
As you increase the number of routes you have saved on plotaroute.com, it's a good idea to put them into groups to help with managing them. This makes it easier to find and compare different routes from a given group, for example all your routes from home.
The route tagging feature lets you group routes together and works much like folders, except that a route can be assigned to more than one group by simply giving it more than one tag. This is how to use the route tagging feature.
ASSIGNING TAGS TO A ROUTE
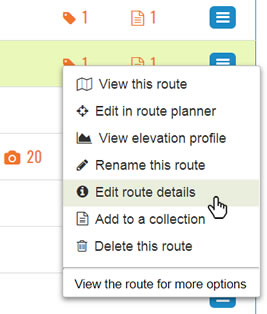
- The first step is to assign tags to your routes. You can do this when you save a new route or you can add tags to a previously saved route from the My Routes page - find your route in the list and click on the context menu button for that route. Then select "Edit route details".
- Click the ASSIGN TAGS button.

- To create a new tag, type it and then press the CREATE NEW TAG button or the ENTER key on your keyboard. As you start typing, suggestions will be offered based on tags you have used before, which you can select if appropriate.

- Alternatively, to select a tag you've used previously, just click on it in the list below to highlight it.
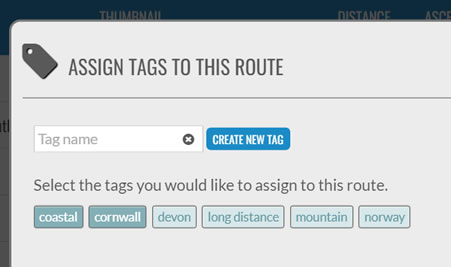
- Click OK once you've chosen the tags and the selected tags will then appear on the TAGS section. If you want to delete one, click the small cross symbol on the tag button.
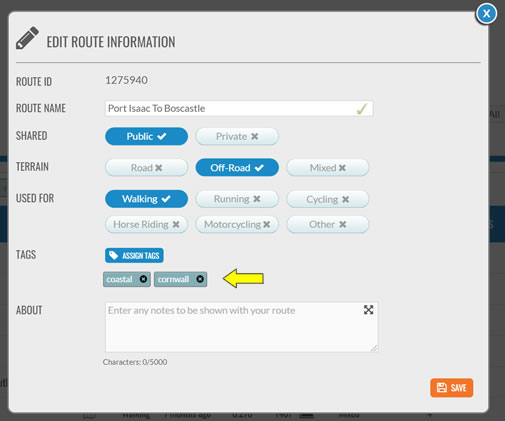
You can assign up to 10 tags to each route (one or more words up to 20 characters long in total). The tags you choose are up to you - it all depends on how you want to group your routes. The above example creates a tag called "coastal", which I could then assign to all my coastal routes, and also a tag called "cornwall".
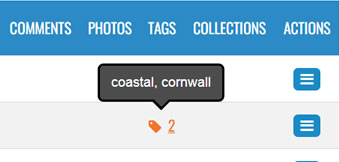
Click the SAVE button when you have finished assigning tags to the route. - Once tags have been added to a route, this will be indicated on the My Routes page under the Tags column. Move the mouse over the tag icon to see which tags have been assigned to a route.
VIEWING TAGGED ROUTES
Once you've assigned tags to your routes, you can then manage your routes more easily on your My Routes page.
- All the different tags that you've assigned will be shown as buttons above the list of routes. To show all the routes that have been assigned a given tag, click on the relevant tag button to select the tag. You can click on more than one tag button if you like, which will filter the list to show only routes with all the selected tags.

- Click the DESELECT ALL button to reset the list to show all your routes again.
- If you have any tags that are no longer assigned to routes, these will be automatically deleted from the tag button list.
MANAGING YOUR TAGS
If you want to delete or rename any tags, click the MANAGE TAGS button on your My Routes page to do this.
TIP: Renaming a tag as an existing tag will merge them together.
SHARING LISTS OF TAGGED ROUTES
Once you've assigned tags to your routes, you can then share subsets of your routes with other people, for example all your hill training routes, your club's beginner routes or maybe all your Sunday stroll routes! It's up to you how you tag your routes, so you can share what you like.
To share a list of selected routes, use the tags as above to select the ones you want, adding more filters with the FILTER button if you like, and then click the SHARE A LINK TO THESE ROUTES button to get a link that you can share.![]()
There are a couple of further things to note:
- The list will only include routes that you have made publicly available (no Private routes will be included).
- If you create any new routes in the future that match the selection criteria you chose, these will automatically become available using the link provided.
