How To Embed A Route Map On Your Website Or Blog

One of the many great features of plotaroute.com is the ability to add routes you've mapped directly on to your own website or blog. These embedded maps (or Video Maps as they have been dubbed) are fully interactive and give people the ability to view your routes in glorious full-screen, without leaving your website, as well as the option to download, print and share them. To embed a route map on your own website, follow these instructions.
- First plot and save the route that you want to embed.
- View the route by selecting it from your My Routes page or your personal Home page.
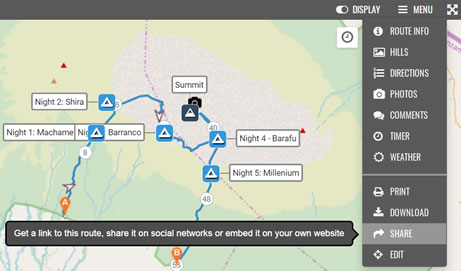
- Select SHARE from the menu above the map.

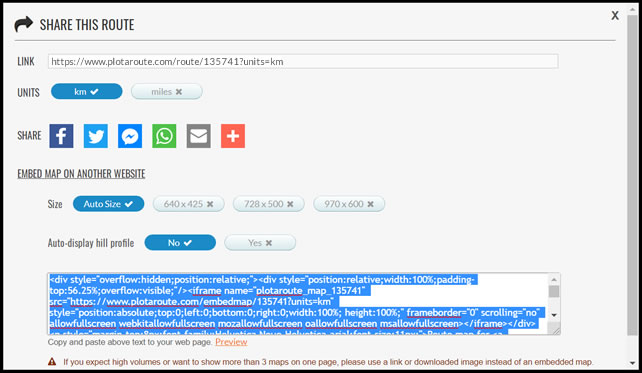
- Choose whether to display the map with the default Map Type and Units (this uses the viewer's own preferences), or whether to override this and display the map with the current Map Type and Units you have selected.
- Choose between the Auto Size option or a fixed size for the map. The Auto Size option will fill the width of the HTML parent container and will adjust the height in proportion - this option is recommended for dynamic websites that are designed for desktop and mobile devices.

- Choose whether you would like to automatically show the elevation profile when the map is activated by clicking play, or whether it should initially just show the map.

- Click on the code for the embedded map to select it and then copy it to your clipboard or save it in a text file.

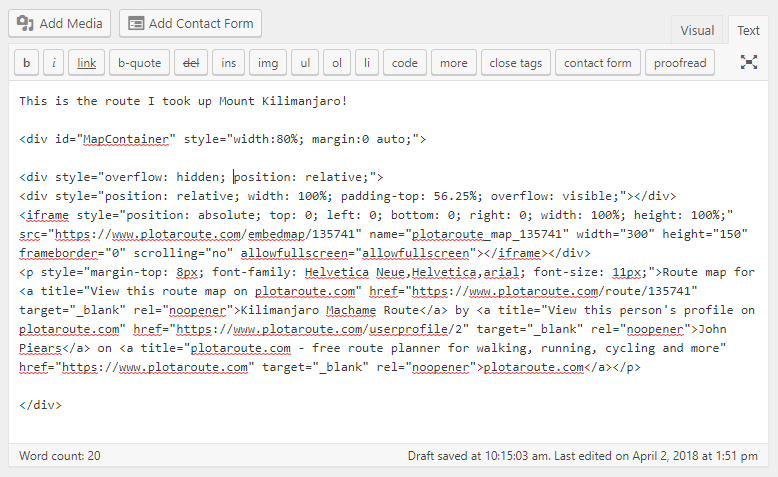
- Open the HTML editor for your website and paste the embed code onto the page where you want to place the map. If you are using Wordpress or a similar CMS, ensure that you are using the HTML (Text) view rather than the Visual view when pasting the code.

- Save the changes to your web page and the map should then display when you next view the page.
Please note, if you make any changes to the route, it can take up to 24 hours for these changes to be reflected in the embedded map.
Share this page
Watch video tutorials...
We have a number of video tutorials demonstrating how to use key features on the site.
